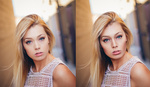
![Making Light Leaks in Lightroom [With Free Brush Download]](https://cdn.fstoppers.com/styles/large-16-9/s3/wp-content/uploads/2014/04/Austin_Rogers_Fstoppers_Make_Light_Leak_In_Lightroom_Cover_jpg.webp)
There's something special about taking a picture on film. That said, film also lent itself to a lot of error: a botched exposure, missed focus and light leaks could all serve to ruin an otherwise lovely image. There are few things more frustrating then getting a roll back from the lab with an error note on the envelope. Occasionally the results were a novelty, perhaps adding interest to an otherwise boring image but all too often light leak was nothing but a bother. So why would anyone want to replicate it in Lightroom?
Seeing that you went ahead and clicked through to read the remainder of this post you, like I, are interested in making light leak in Lightroom. In a bout of boredom the other day, I was wondering just how to go about doing so but found little through the usual channels (Google, YouTube, Fstoppers), only finding preset packs which sold for $50+ which had little room for customization. So I went the DIY route. Looking at several analog photos with some nasty light leak, I made two brushes which can be layered to replicate the defect in a precise, ascetically pleasing way.
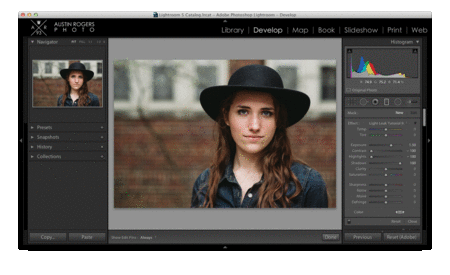
For this tutorial we're going to be making two brushes in Lightroom, I'll be using v.5.4 but this should be forward and backward compatible (the only major difference is the lack of radial filters in earlier versions).

The first brush will be dark and colorful and will be used for the exterior edges of the light leak.
- Temp 100
- Tint 100
- Exposure 1.00
- Contrast +/- 100
- Highlights -100
- Shadows 100
- Saturation to 100
- Color set to H 0º, 75%
The second brush is lighter and has no color. It will be used for the interior of the leak.
- Exposure +1.50
- Contrast +/-100
- Highlights -100
- Shadows 100
You can download these two brushes here if you'd like. (They'll go into your Local Adjustments Presets folder).
Once you have your brushes made, you can play around with different combinations of shape, opacity, exposure, and contrast — each image will be a little different.
If you're using Lightroom 5 or newer you have three options for application: gradient filter, radial filter, or brushes. Each will produce different results. Below are some ideas for application patterns of your light leaks. Note the difference in color, shape, and intensity.

Below are some quick sample edits with light leak.
This is made with a combination of gradient and radial filters.

This is made with a combination of gradient filters and brushes.
If you give this tutorial a shot I'd love to see what you make in the comments below.


Can't you buy some fancy Canon, Sony, and Nikon lenses/bodies that did that unintentionally? Why fake it when you can have the real deal?...
I hear the α7 does it beautifully! :)
http://fstoppers.com/your-sony-a7a7r-might-light-leak-how-you-can-fix-it
There ya go...
A lot of these effects (that for example comes with the plug-in Exposure) I don't really understand, this light-leak thing is one of them. Why would you purposely make your image worse? Why would you want a blotch that distracts from your subject? Is it because your photo wasn't that good to begin with and needs something that instead makes you think of the analogue days and play the nostalgia-harp instead of improving your photography?
Can someone explain it to me, please.
well i don´t get instagram either.. but many noobs and wannabe artist think a premade effect makes art of their crappy snapshots....
thanks, I tried it, has a beautiful effect
noob.....
and why would we do that?
that´s the new tilt shift... a effect that is boring in no time. and then you have all these crappy images with light leak.
because we can?
I'm personally a fan of tilt-shift, particularly in portraiture. HDR is what comes to mind when I think of an effect that is boring in no time. :) The cool thing about editing in LR is that it's all nondestructive, if your sensibility changes over time you can always revert and reprocess.
How I install the filter in Lightroom?
thanks for the help
Hey man! The easiest way is probably just opening LR, going to preferences, clicking "show lightroom presets folder", clicking "local adjustments presets" then putting them in there. Then when you want to use the brushes you'll find them by clicking "effect" over on the right under the brush (where you'd get "tint, temp, teeth whiten," etc.).
So much insecurity in these comment threads.
Hey Austin,
When I download your files, they end up being .txt files instead of Irtemplete files. Do you happen to know what's going on with that?
Very cool. Can't wait to play around and see what I can come up with. Thank you for the article Austin.